What is IdeaPress and how does it work? This blog post is intended to provide a simple step-by-step walk-through of IdeaPress, as well as the “aftermath” of it.
First and foremost, IdeaPress empowers an online wizard to transform any WordPress site (self-hosted or hosted on WordPress.com) into a Windows 8 App.
Here’s how it works:
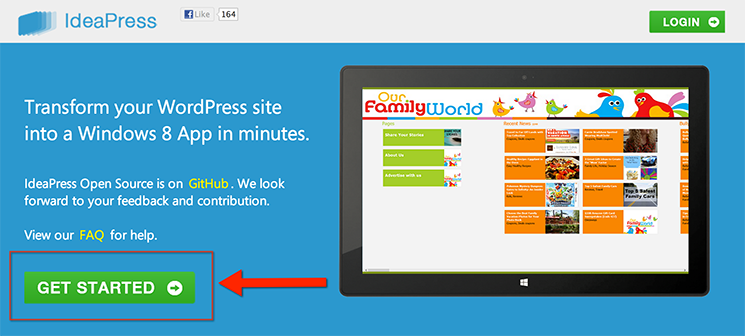
1) GET STARTED on the home page of http://ideapress.me
2) Enter your WordPress website URL and your email address
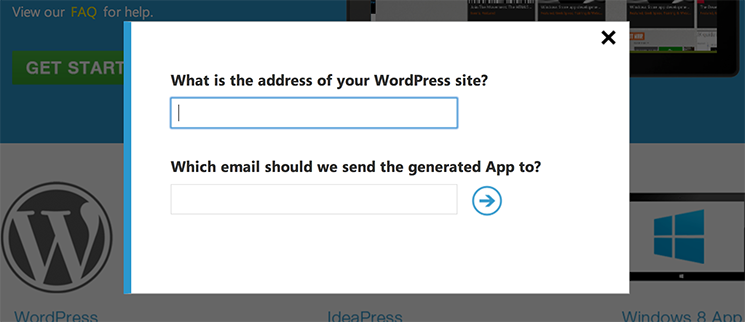
Once submitted, an email will be sent to you and you can then set a password to activate your account. However, you do NOT need the activated account to proceed. You will be brought to Step 1 of the wizard to initialize your app generation.
3) Wizard Step 1 – Initialization
The wizard will automatically analyze the URL you supplied to determine if prerequisites are met. If the requirements are met, the wizard will automatically advance to the next step. Otherwise you will need to follow the on-screen instructions to fulfill them.
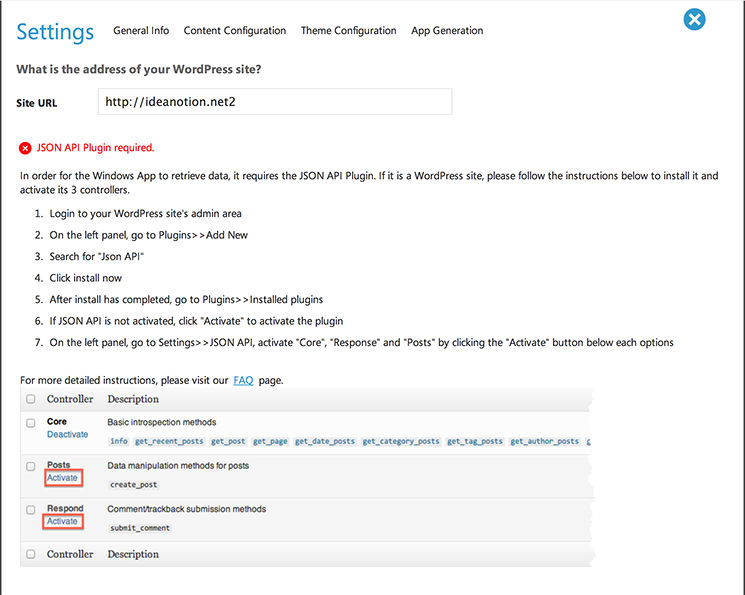
Prerequisite for Self-Hosted WordPress sites:
In order for the Windows 8 App to access data from your WordPress site, you will need to install JSON API Plugin. Please visit the FAQ#JSONAPI page for more details.
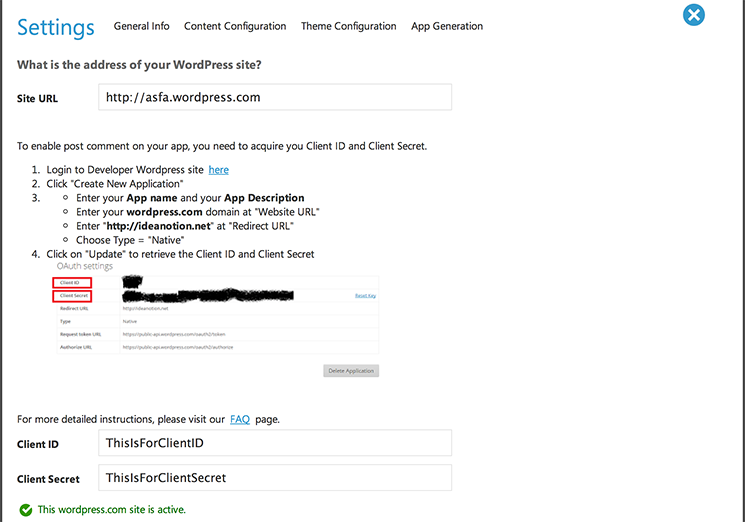
Prerequisites for WordPress.com hosted sites:
In order to enable commenting capabilities, it is required that you supply a Client ID and Client Secret. Please visit the FAQ#WPCID page for more details.
4) Wizard Step 2 – General Info
In this step you simply enter a name and a description. They are both important: App Name appears on the Windows Store and description gives your audience the first overview and largely influences whether your App will pass Microsoft certification.
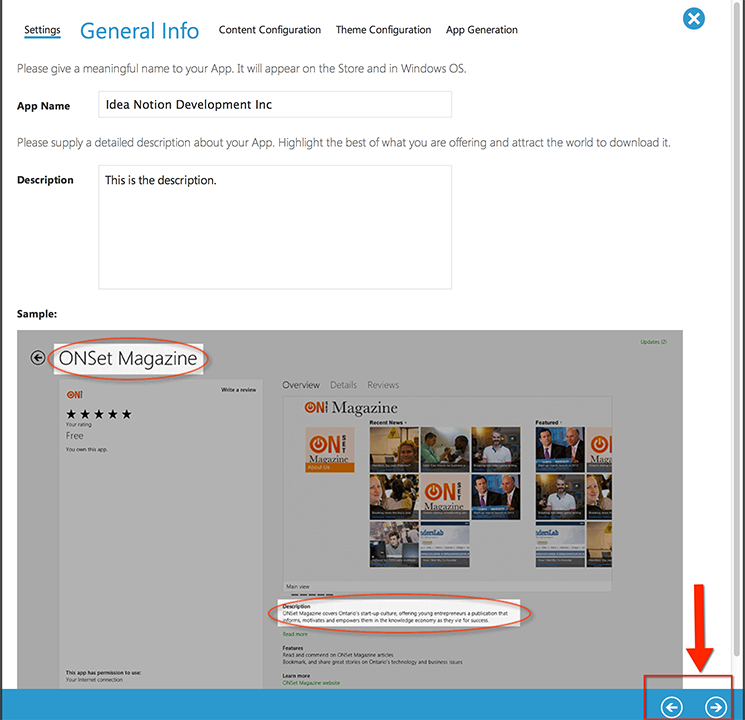
You will use the arrows at the bottom of the wizard to navigate to the next step.
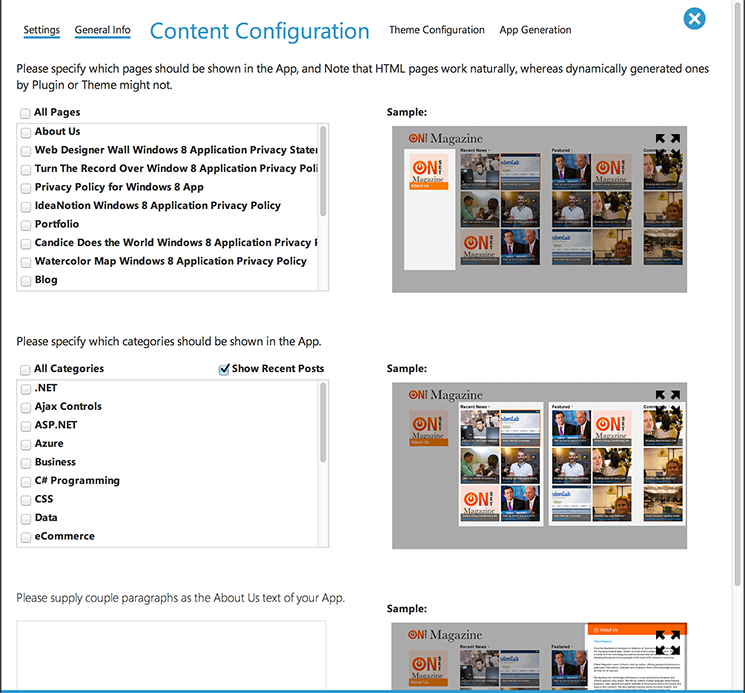
5) Wizard Step 3 – Content Configuration
Here the wizard has pulled down the Pages and Categories of your WordPress site, and you can select the ones you wish to have appeared in your Windows 8 App. Also you can enter the About text, which resides in the App, as opposed to the description in the previous step which appears on the Windows Store.
6) Wizard Step 4 – Theme Configuration
A number of options are available in this step for you to customize how your Windows 8 App would look. The options include:
- 6 different layouts to choose from
- Background image
- Title image – If no image then it displays your App Name in text
- Default article image – If your blog post doesn’t have a featured image, this will be shown in the tile
- 10 color themes to choose from as your base theme
- Background color
- Header color
- Item overlay color – the overlay box covering the bottom portion of a tile
- Item title color
- Item subtitle color
- Wide Logo (310 x 150) and Standard Logo (150 x 150)
- Splash screen image
- Background color for the detailed view of a post
- Text color
- Anchor link color
The Windows button can be clicked on in the Preview, as well as the tiles and back button arrows.
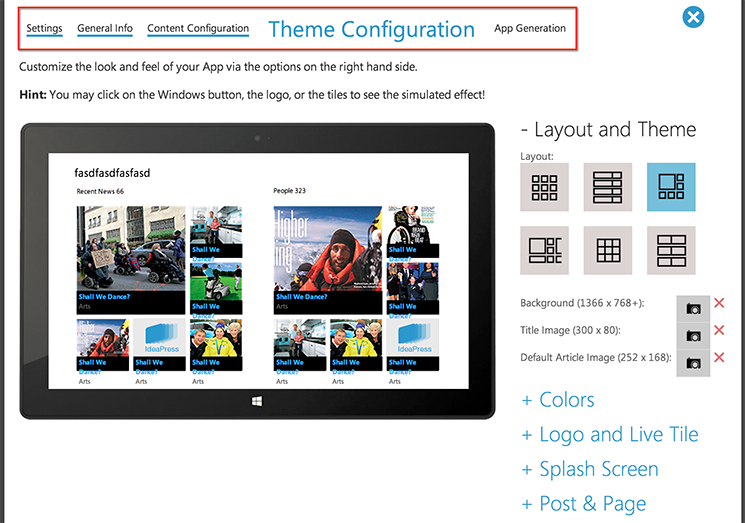
Also, the breadcrumb can be used to navigate back to the previous steps once you’ve successfully bypassed them.
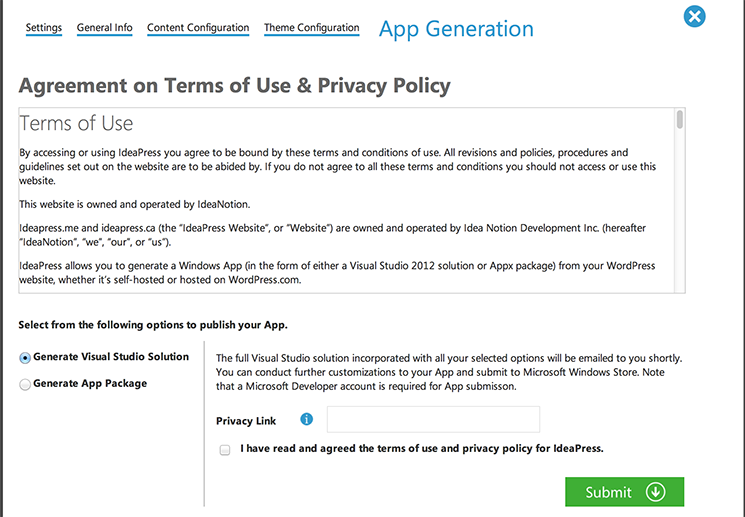
7) Wizard Step 5 – App Generation
Upon accepting the IdeaPress Terms of Use, you have 2 options:
- Generate Visual Studio solution
You need to prepare your App’s privacy policy page and you are free to customize your App further.
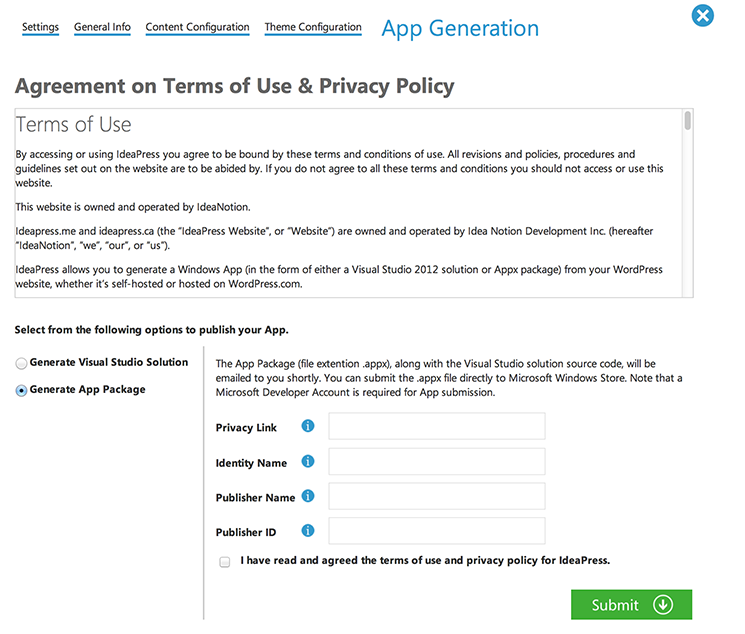
- Generate Appx Package
The generated Appx package, given that you’ve provided the correct publisher information, is digitally signed with your credential and thus can be used for submission to the Store directly.
8) The “Aftermath”
NOTE that IdeaPress helps to create your App, but it does NOT publish your App to the Windows Store. To publish an App to the Windows Store, you will need a Microsoft Developer Account, which grants you access to the Microsoft Dev Center for submission. Once your App is submitted to Microsoft, a certification process will take place to approve your App before it can become available in the Store. To gain more insights on how exactly to publish an App, please check out the FAQ page here: http://ideapress.ca/faq#publish
There is a LIMITED TIME 3rd option right now where we will publish your App on your behalf. FREE OF CHARGE!! Simply contact us at ideapress@ideanotion.net and tell us your email + App Name.
By Bryan Xu